Scaffolding an Application From Existing Database with EF Core on ASP.NET Core
Oh hey there! In my last blog post I looked at Microsoft Cognitive Services. Today, I thought I would continue this little Microsoft streak and dive into another Microsoft products – ASP.NET Core 2.0 and EF Core.
If you write software for a living or just for fun, you’ve probably worked with databases before. A couple of days ago, during the regular cleaning of my hard drive, I’ve found an old database with Orders data from my previous projects. So, today our task will be to scaffold an API from my existing SQL Server database and create a simple UI to present the data to the users.
What should I have installed in order to follow along?
- You should install the .NET SDK from their official website
- Visual Studio 2017 – Community is free for students, hobbyists and startups
- Microsoft SQL Server Express with management tools
Orders database
In order to follow along this blog post you’ll need to import Orders database into your SQL Server. The database can be found here on Github. This process is pretty straightforward. Open SQL Management Studio, then right click Databases -> Restore database.
Create a new project
We’ll kick things off by creating a new Web API project.
- File –> New project –> ASP.NET Core Web Application
- Enter solution name: OrdersViewer
- Select Web API project template
Reverse engineer Order model
Now it’s time to create the EF model based on existing database. To do that you need to replace server connection string with your own and run this command from NuGet console in Visual Studio:
- Tools –> NuGet Package Manager –> Package Manager Console
Scaffold-DbContext "Server=localhost\SQLEXPRESS;Database=orders_database;Trusted_Connection=True;" Microsoft.EntityFrameworkCore.SqlServer -OutputDir ModelsThe reverse engineering process created entity class Orders.cs, and a derived context orders_databaseContext.cs based on the schema of the existing database.
The entity classes are simple C# objects that represent the data you will be querying and saving. The context represents a session with the database and allows you to query and save instances of the entity classes. Now we need to add a Data folder and put our context there to conform with the separation of concerns pattern. We’ll also rename our context to OrderContext.cs and Orders.cs to Order.cs since it’s more logical that way.
Remove inline context configuration
In ASP.NET Core, things like dependency injection, services that are going to be used, generally configured in Startup.cs class. So, we need to move database provider configuration there.
- Open
OrderContext.cs - Remove the
OnConfiguring(...)method - Add the following constructor, which will allow configuration to be passed into the context by dependency injection
public OrderContext(DbContextOptions options) : base(options){ }Register and configure OrderContext.cs in Startup.cs
Now we need to make sure that API is aware of what to do when it encounters a need for an OrderContext. We are going to register our context as a service.
- Open
Startup.cs - In the
ConfigureServices(...)method add the following code:
public void ConfigureServices(IServiceCollection services){ services.AddMvc(); var connection = @"Server=localhost\SQLEXPRESS;Database=orders_database;Trusted_Connection=True;"; services.AddDbContext<OrderContext>(options => options.UseSqlServer(connection));}In order for this to work, we need to add the following using statements at the top of the file:
using Microsoft.EntityFrameworkCore;using OrdersViewer.Models;Create a controller
Because we started this as API project, by default the ValuesController.cs was created for us. That’s a good example for us of how the controller code should look like. Let’s create an OrdersController.cs:
- Right-click on the
Controllersfolder and selectAdd->Controller…
Paste the following code in the controller file:
using System;using System.Collections.Generic;using System.Linq;using System.Threading.Tasks;using Microsoft.AspNetCore.Mvc;using Microsoft.EntityFrameworkCore;using OrdersViewer.Models;
namespace OrdersViewer.Controllers{    [Route("api/[controller]")]    public class OrdersController : Controller    {        OrderContext _context;        public OrdersController(OrderContext context)        {            _context = context;        }
        // GET api/orders        [HttpGet]        public async Task<IActionResult> GetAsync()        {            var orders = await _context.Orders.AsNoTracking().ToListAsync();            return Ok(orders);        }    }}
As you can see, our controller has only one endpoint to get all orders. Also, we created a constructor which takes context and stashes it in the private variable. Since we don’t need a Values controller, you can remove it from the project.
Add swagger
Now you’ll see how easy it is to add Swagger to this project.
- Right click on OrdersViewer project and select Manage NuGet Packages
- Browse and install the package called Swashbuckle.AspNet.Core
- Open
Startup.cs - In the
ConfigureServices(...)method add the following line at the bottom:
services.AddSwaggerGen(options => options.SwaggerDoc("v1", new Info { Title = "Orders Viewer", Version = "v1" }));- In the
Configure(...)method add the following statements at the top:
app.UseSwagger();if (env.IsDevelopment() || env.IsStaging()){ app.UseSwaggerUI(options => options.SwaggerEndpoint("/swagger/v1/swagger.json", "Orders viewer v1"));}Don’t forget to add associated using statement after that.
using Swashbuckle.AspNetCore.Swagger;Okay, we have a couple more things to do for our backend service. By default, Visual Studio 2017 use IIS Express as a web server for the project. We need to change that to our local server by selecting OrdersViewer from the drop-down menu.

Next, we’ll set a startup URL.
- Right click on the OrdersViewer project and select Properties
- In the Debug section, set Launch Browser property to
swagger
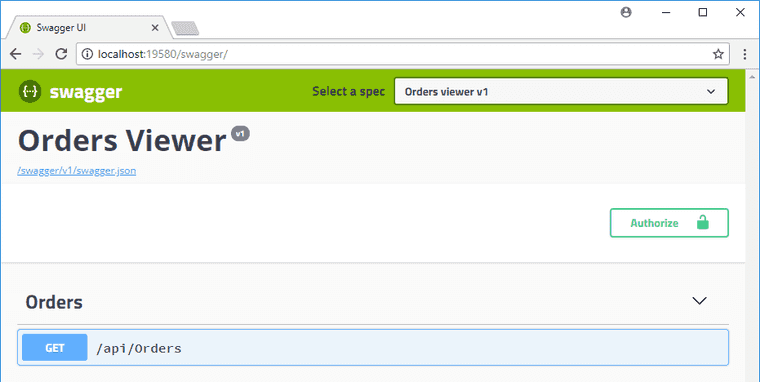
That’s it! Now with the elegant movement of the mouse, press the OrdersViewer button, to start the project. You should see your browser pop up with the Swagger page opened.

Here you can actually test our newly created endpoint by clicking Try it out and then Execute. If you see the list of orders, that means everything works fine and we can move on to the next part of our project – building a simple UI to display this data to the user.
Building front-end UI
Ok! It looks like we need to create some kind of front-end to display all our orders to the users, right? Let’s do that right now.
- Right click on the solution Add –> New project –> ASP.NET.Core Web Application
- Project Name: OrdersViewer.UI
- Select Web Application template, because we’re going to use Razor pages
- Change authentication to Individual user accounts
All right, our project is ready, now we need to configure it properly.
Add reference to our backend project
- Right click on the project OrdersViewer.UI and then Add -> Reference
- Select OrdersViewer and click OK
Scaffolding order pages
If you want to quickly build some simple stuff, page-focused architecture is great for that. Razor pages are built on top of MVC and it’s basically a mix of HTML and C#. It’s a perfect fit for our situation.
- Right click on the Pages folder and add new folder Orders
- Right click on the Orders folder Add -> Razor Page
- In the scaffolder window select Razor Pages using Entity Framework (CRUD)
- Select model class Orders (OrdersViewer.Models)
- Select data context class ApplicationDbContext (OrdersViewer.UI.Data) (this is selected temporarily, we are going to replace this later.)
Now we need to add a frontend API client that knows how to reach to the backend and ask for data.
- Right click on the Services folder Add -> Class -> Interface
- Enter the interface name
IApiClient.cs
Paste the following code in the interface file:
using System;using System.Collections.Generic;using System.Linq;using System.Net.Http;using System.Threading.Tasks;using OrdersViewer.Models;
namespace OrdersViewer.UI.Services{    public interface IApiClient    {        Task<List<OrdersViewer.Models.Order>> GetOrdersAsync();    }
    public class ApiClient : IApiClient    {        private readonly HttpClient _HttpClient;
        public ApiClient(HttpClient httpClient)        {            _HttpClient = httpClient;        }
        public async Task<List<Order>> GetOrdersAsync()        {            var response = await _HttpClient.GetAsync("/api/Orders");            response.EnsureSuccessStatusCode();            return await response.Content.ReadAsJsonAsync<List<Order>>();        }    }}
Okay, now we need to cheat a little bit and copy one more file HttpClientExtensions.cs into our project.
Create this file in the root directory of the OrdersViewer.UI project with the following content:
using Newtonsoft.Json;using System.IO;using System.Net.Http;using System.Threading.Tasks;
namespace OrdersViewer.UI.Services{    public static class HttpClientExtensions    {        private static readonly JsonSerializer _jsonSerializer = new JsonSerializer();
        public static async Task<T> ReadAsJsonAsync<T>(this HttpContent httpContent)        {            using (var stream = await httpContent.ReadAsStreamAsync())            {                var jsonReader = new JsonTextReader(new StreamReader(stream));
                return _jsonSerializer.Deserialize<T>(jsonReader);            }        }
        public static Task<HttpResponseMessage> PostJsonAsync<T>(this HttpClient client, string url, T value)        {            return SendJsonAsync<T>(client, HttpMethod.Post, url, value);        }        public static Task<HttpResponseMessage> PutJsonAsync<T>(this HttpClient client, string url, T value)        {            return SendJsonAsync<T>(client, HttpMethod.Put, url, value);        }
        public static Task<HttpResponseMessage> SendJsonAsync<T>(this HttpClient client, HttpMethod method, string url, T value)        {            var stream = new MemoryStream();            var jsonWriter = new JsonTextWriter(new StreamWriter(stream));
            _jsonSerializer.Serialize(jsonWriter, value);
            jsonWriter.Flush();
            stream.Position = 0;
            var request = new HttpRequestMessage(method, url)            {                Content = new StreamContent(stream)            };
            request.Content.Headers.TryAddWithoutValidation("Content-Type", "application/json");
            return client.SendAsync(request);        }    }}
This is just some boilerplate stuff that let’s us get some json, send some json, deserialize it appropriately in our client.
Register ApiClient service in a startup file
So, now that we’ve got our client built, what we need to do is to register that as a service and make it available for dependency injection, so that any page can use it. This is cool because we configure it in one place and then depending on your environment variables it can have different Service URL.
- Open Startup.cs and add the following code to the
ConfigureServices(...)method aboveservices.AddMvc():
services.AddScoped(_ => new HttpClient { BaseAddress = new Uri(Configuration["ServiceUrl"]) });services.AddScoped<IApiClient, ApiClient>();Don’t forget to generate corresponding using statements. Notice that we are making that client scoped, which means that it’s only going to be created once for each request.
Update the pages
Now we have our API client and it’s able to go and get data. Let’s look at our index page for the orders. We want to make sure that we’re using the right models. It should run against IApiClient.
- Open Pages/Orders/Index.cshtml.cs file
- Make sure we use the right model –
IApiClient. The file should look like this:
using System;using System.Collections.Generic;using System.Linq;using System.Threading.Tasks;using Microsoft.AspNetCore.Authorization;using Microsoft.AspNetCore.Mvc;using Microsoft.AspNetCore.Mvc.RazorPages;using Microsoft.EntityFrameworkCore;using OrdersViewer.Models;using OrdersViewer.UI.Data;using OrdersViewer.UI.Services;
namespace OrdersViewer.UI.Pages.Orders{    public class IndexModel : PageModel    {        private readonly IApiClient _Client;        public IndexModel(IApiClient client)        {            _Client = client;        }
        public IList<Order> Orders { get; set; }
        public async Task OnGetAsync()        {            Orders = await _Client.GetOrdersAsync();        }    }}
After that we need to make corresponding changes to the Index.cshtml file.
- Open
Index.cshtmlfile - Make sure we use the right model, the file should look like this:
@page@model OrdersViewer.UI.Pages.Orders.IndexModel
@{    ViewData["Title"] = "Index";}
<h2>Index</h2>
<p>    <a asp-page="Create">Create New</a></p><table class="table">    <thead>        <tr>                <th>                    @Html.DisplayNameFor(model => model.Orders[0].OrderDate)                </th>                <th>                    @Html.DisplayNameFor(model => model.Orders[0].Amount)                </th>                <th>                    @Html.DisplayNameFor(model => model.Orders[0].Currency)                </th>                <th>                    @Html.DisplayNameFor(model => model.Orders[0].CustomerName)                </th>                <th>                    @Html.DisplayNameFor(model => model.Orders[0].CustomerEmail)                </th>            <th></th>        </tr>    </thead>    <tbody>@foreach (var item in Model.Orders) {        <tr>            <td>                @Html.DisplayFor(modelItem => item.OrderDate)            </td>            <td>                @Html.DisplayFor(modelItem => item.Amount)            </td>            <td>                @Html.DisplayFor(modelItem => item.Currency)            </td>            <td>                @Html.DisplayFor(modelItem => item.CustomerName)            </td>            <td>                @Html.DisplayFor(modelItem => item.CustomerEmail)            </td>            <td>                <a asp-page="./Edit" asp-route-id="@item.Id">Edit</a> |                <a asp-page="./Details" asp-route-id="@item.Id">Details</a> |                <a asp-page="./Delete" asp-route-id="@item.Id">Delete</a>            </td>        </tr>}    </tbody></table>
Add necessary settings
Now we need to add some configuration parameters for the UI project.
- Open configuration file
appsettings.json - Add a config string
"ServiceUrl": "http://localhost:1369/"
The value of the “ServiceUrl” here can be found in OrdersViewer project properties. Right click on the OrdersViewer project and Properties -> Debug -> AppURL.
Change solution startup settings
Finally, we need to add finishing touches to our solution so we can launch both projects simultaneously.
- Right click on the solution, and in the solution settings change Set as startup project – Multiple startup projects
- Select action for each project: Start
Start both projects
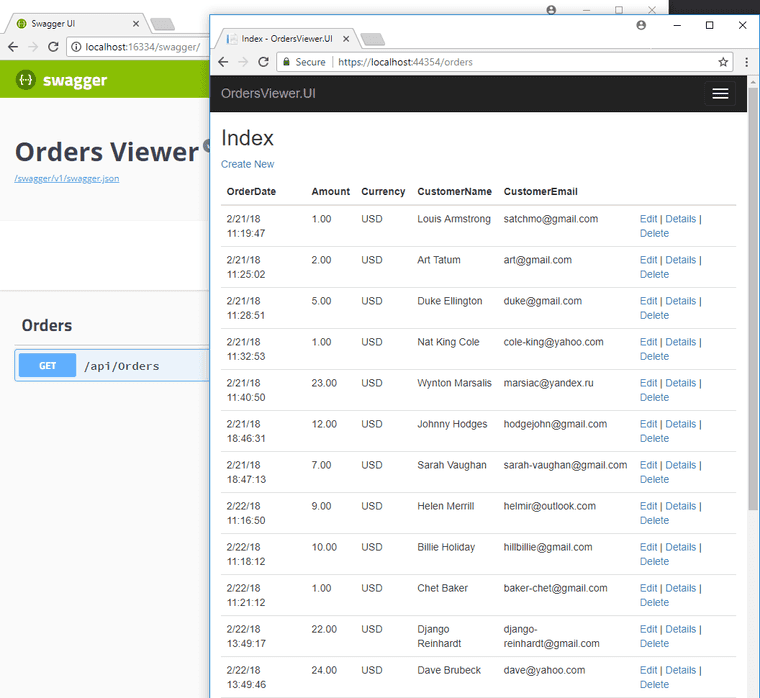
Now we are ready to start our projects. Simply press Start and both projects should be launched at the same time. You should see two browser windows pop up. And if you navigate in OrdersViewer.UI window to the /projects page, you should see a list of orders from our database.

So, in this exploration of .NET Core scaffolding possibilities we did figure out the structure of the web API and UI projects, how everything works in general.
Of course this is in no way a production-ready example, in fact you now may have more questions than answers, but such is life.
Stay tuned and subscribe for more! I’ll go grab some pizza.