Migrating Gatsby Markdown Blog to MDX
In this short but informative blog post, I'll share some of my experiences of moving from a regular Gatsby Markdown Remark blog to MDX.
I’ve always wanted to add a little bit more interactivity to my blog posts. For me, it’s a lot easier to grasp the concept that I’m reading about if it’s accompanied by a good visual explanation.
This may be a drawing, a diagram, a chart, an animation, a movie, basically anything that’s not just a wall of text.
Somewhere on the internets, I’ve read about this new kid on the block called MDX. It promised exactly the thing that I was looking for - the ability to embed interactive React components right into my Markdown blog posts.
Inspired by this idea I tried several times to convert my Gatsby blog to MDX, but failed miserably. I don’t even know why. Maybe it was because I compiled different features of my blog from various tutorials of dubious quality and all these parts just didn’t play well together, who knows.
I just couldn’t find a well-structured guide that tells me step-by-step what I need to do in order to succeed and the story always ended with me breaking my blog completely and unequivocally.
To my luck, the Gatsby team had a recent pair-programming session where Aisha and Benjamin talked about documentation and migrating a site from using Remark to MDX.
Finally, after watching the stream, I had a clear plan of action in my head, so I didn’t hesitate and jumped right in.
In this blog post, I want to share some of the problems that I’ve encountered along the way.
Now, I’m well aware that your blog may differ from mine as a hedgehog differs from a fish, but still, this chronicle may be useful for you if you based your blog on the famous gatsby-starter-blog.
Installing gatsby-plugin-mdx
If you’ve built your blog following a Gatsby tutorial or were using gatsby-starter-blog, it’s probably powered by gatsby-transformer-remark. The Remark is used to parse your Markdown files and do all that AST transformation shenanigans which are miles above my level of understanding.
In my case I needed to replace it with MDX, so that’s what I did!
The first thing that I did was to install the MDX plugin. But in order for this plugin to work, I also needed to install some additional React packages.
npm install @mdx-js/mdx @mdx-js/react gatsby-plugin-mdxSince I no longer needed gatsby-transformer-remark plugin, I safely unistalled it.
npm remove gatsby-transformer-remarkUpdating gatsby.config file
You may have noticed that gatsby-transformer-remark plugin had a bunch of sub-plugins itself, such as gatsby-remark-images, gatsby-remark-responsive-iframe, gatsby-remark-smartypants (this last one has a particularly funny name. Can you image a plugin wearing pants? I giggle every time I see this).
So, what’s up with these? Do I need to uninstall them too?
No worries! Turns out that the MDX plugin can still work with these sub plugins. I only needed to make a couple of adjustments here: replace gatsby-transformer-remark with gatsby-plugin-mdx and plugins to gatsbyRemarkPlugins.
{- resolve: `gatsby-transformer-remark`+ resolve: `gatsby-plugin-mdx` options: {- plugins: [+ gatsbyRemarkPlugins: [Updating gatsby.node file
The next step was to update my gatsby.node file, where we tell Gatsby to build pages from Markdown files. I replaced every occurrence of allMarkdownRemark to allMdx.
const result = await graphql( ` {- allMarkdownRemark(+ allMdx( sort: { fields: [frontmatter___date], order: DESC } filter: {frontmatter: {draft: {eq: false}}} limit: 1000 ) {Additionally, in the onCreateNode hook, where the creation of slugs for pages happens, and possibly in other places of this file, I replaced MarkdownRemark with Mdx. This lets the plugin know that we’re now working with MDX nodes instead of Remark ones.
exports.onCreateNode = ({ node, actions, getNode }) => { const { createNodeField } = actions- if (node.internal.type === `MarkdownRemark`) {+ if (node.internal.type === `Mdx`) { const value = createFilePath({ node, getNode }) createNodeField({In my case, I had some schema customization dark magic going on, so I had to do more replacements.
createTypes(`- type MarkdownRemark implements Node {+ type Mdx implements Node { frontmatter: Frontmatter } type Frontmatter { draft: Boolean @defaultFalse } `)Also, I had a special secret resolver in my gatsby.config, so again, global find and replace was my friend here.
Sepecifying both .md and .mdx extenstions in gatsby.config
Knowing that I have a fair bit of laziness in me, I didn’t really want to go over every file and change it’s extension to .mdx. Besides, not all of the posts may have interactive bits in them. Lucky for me, I was able to tell the plugin to work with both .md and .mdx files:
{ resolve: `gatsby-plugin-mdx`, options: {+ extensions: ['.md', '.mdx'], gatsbyRemarkPlugins: [ {Updating allMarkdownRemark to allMdx in pages
Next up, I updated every page in src/pages. Everywhere where I used allMarkdownRemark, I changed it to allMdx.
I had quite a lot of this type of entries in my pages, so for me, it was easier to use the global “find in the project” feature of my IDE and then carefully replace every occurrence.
const LatestPosts = () => { const data = useStaticQuery(graphql` query LatestPostsQuery {- allMarkdownRemark(+ allMdx( sort: { fields: [frontmatter___date], order: DESC} filter: {frontmatter: {draft: {eq: false}}} limit: 8 ) {Updating MarkdownRemark to mdx in the blog post template
This one was pretty simple. I replaced every occurrence of MarkdownRemark to mdx in the templates/blog-post.js template. If you’ve been using MarkdownRemark in some other places, you should replace it there too.
Using MDXRenderer to render HTML
Remark renders HTML a bit differently than MDX. It returns html in GraphQL query, which is then gets embedded directly into the page with dangerouslySetInnerHTML.
MDX is using MDXRenderer. So, I imported it in my blog-post.js template.
import { MDXRenderer } from "gatsby-plugin-mdx"After that, in the GraphQL query, I changed the html field to body.
export const pageQuery = graphql` query BlogPostBySlug($slug: String!) { mdx(fields: { slug: { eq: $slug } }) { id excerpt(pruneLength: 160)- html+ body frontmatter {Finally, I replaced the line that inserts HTML into the page, to MDXRenderer:
<p> {post.frontmatter.description} </p> </div>- <section dangerouslySetInnerHTML={{ __html: post.html }} />+ <MDXRenderer>{post.body}</MDXRenderer> </div></article>Helpful tip: If you’re following this blog post, at this point I suggest you temporarily move the majority of your blog posts to another folder.
If you’re like me and your posts have undergone significant experiments with embedding all sorts of **** in them, it’s better to move them to another folder for the time being. Maybe leave just one for the MDX plugin to have something to work with. That way you may not be hit by a thousand errors in your console.
Then, when you’re ready, cross your fingers, grab something to drink and type gatsby develop in the console.
To my surprise, when I did this, I was greeted by my own blog now powered by MDX. Woo-hoo!
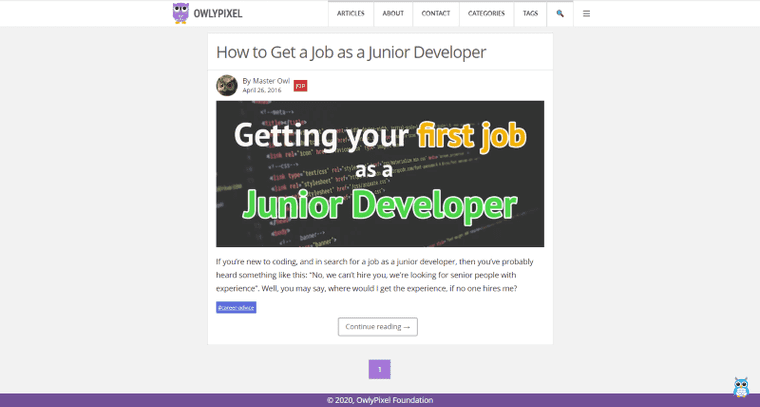
Gotcha 1: make sure your <img /> and <br/> tags are closed.
In the wake of indescribable delight, I dropped all of my blog posts back in the blog folder and immediately regretted doing so.
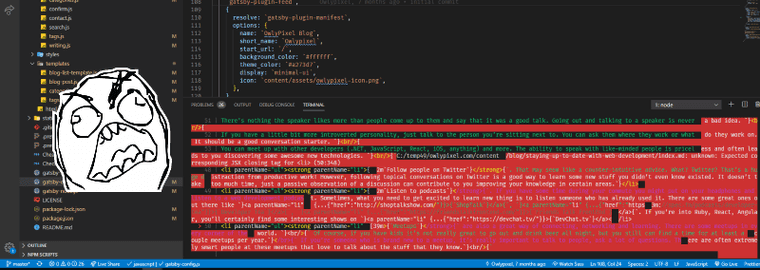
Once you transition to MDX everything becomes JSX, which is React’s templating language on top of HTML.
Interestingly enough, the class vs className issue didn’t come up despite the fact that I have a ton of classes in my posts. But what made itself obvious very quickly is self-closing <img/> and <br/> tags.
I had to manually go through every post and type that closing slash until my fingers hurt. But hey, no pain - no gain, yea?
Gotcha 2: figcaption cannot appear as a descendant of p
The next problem in the list was that every Markdown image on my blog suddenly became wrapped with a <p> tag.

After some searching, I discovered that someone else had this problem too.
The solution was to install an additional Remark plugin called remark-unwrap-images, which solved the issue for me.
{ resolve: `gatsby-plugin-mdx`, options: { extensions: ['.md', '.mdx'], gatsbyRemarkPlugins: [... ], plugins: ['gatsby-remark-images'],+ remarkPlugins: [require('remark-unwrap-images')], }, },Gotcha 3: allowfullscreen must not be a string
The next issue was not a huge one, but it still managed to paint my console in red, which I didn’t like, so I had to deal with it.
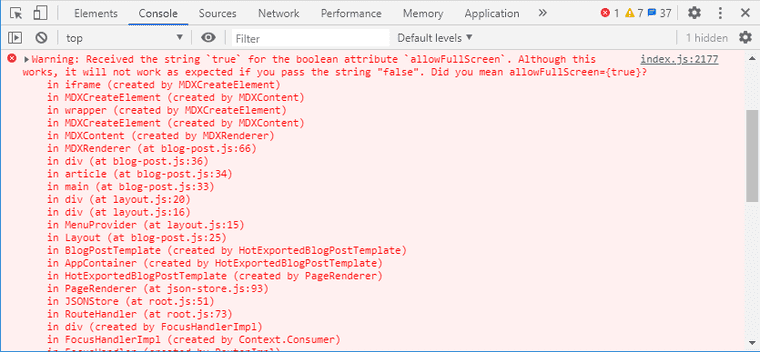
I embed a ton of CodePens in my posts and in the embed snippet everywhere where there’s a string allowfullscreen="true" I had to replace it with allowfullscreen={true} and the error disappeared.
<iframe height="400" style="width: 100%;" scrolling="no" title="Owlymug" src="https://codepen.io/owlypixel/embed/rjVqMG?height=265&theme-id=0&default-tab=css,result" frameborder="no" allowtransparency="true" allowfullscreen={true}> See the Pen <a href='https://codepen.io/owlypixel/pen/rjVqMG'>Owlymug</a> by Owlypixel (<a href='https://codepen.io/owlypixel'>@owlypixel</a>) on <a href='https://codepen.io'>CodePen</a>.</iframe>
Gotcha 4: style blocks
For the styling purposes, I often open a quick style tag and add blog post styles right in there. I know, this adds global CSS that may affect other pages on the blog, don’t yell at me, but sometimes when in a hurry I do even worse things, so…
Here you have as many options as there are npm modules in this world. Styled components, CSS in JS, Inline CSS, CSS Modules, Stylable, you name it. Just don’t forget to remove style blocks from your Markdown.
Gotcha 5: huge white space above all Markdown images
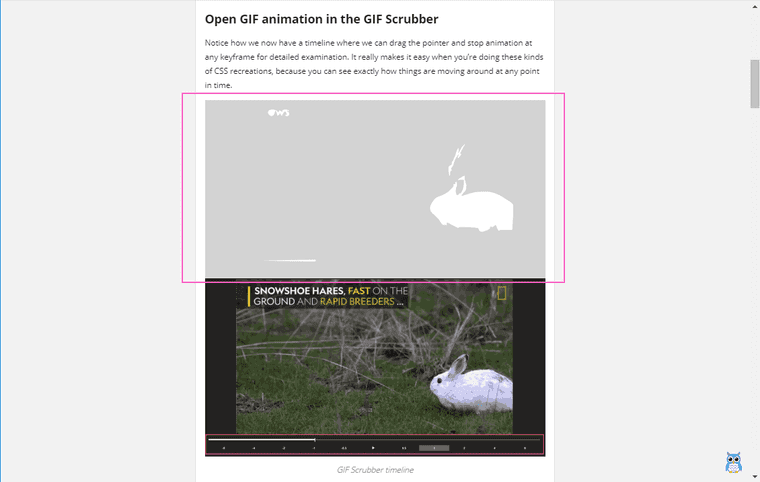
It is known that if you suddenly have a HUGE white space or what seems like an SVG overlay above all your images, you have to duplicate gatsby-remark-images in a plugins array that you seemingly got rid of?!?
{ resolve: `gatsby-plugin-mdx`, options: { extensions: ['.md', '.mdx'], gatsbyRemarkPlugins: [... ],+ plugins: ['gatsby-remark-images'], remarkPlugins: [require('remark-unwrap-images')], },Of course, this is totally obvious (not for me, really). However, I’ve got another issue fixed thanks for the solution found in this thread, yay!
At this point, if you’ve been following this post, you can copy all your blog posts back into the blog folder and see what destiny has prepared for you. For me, all errors were solved by this exact moment.
If you’ll encounter some other errors, feel free to reach out! Gatsby has such a welcoming community and lovely people that’ll help you to find the right solution.
Final words
Without paying attention to some minor hiccups, the transition went pretty well and I now can create and embed interactive, reusable components in my posts to my heart’s content.
I hope this post may suggest a hint or two for someone embarking on the same road of making their Gatsby Markdown Blog even more awesome.
Meanwhile, I’ll go have some mushroom soup that I made yesterday.
Captain Owlypixel, signing off.


