Exploring What’s New in ASP.NET Core 2.1 by Building a Cat App
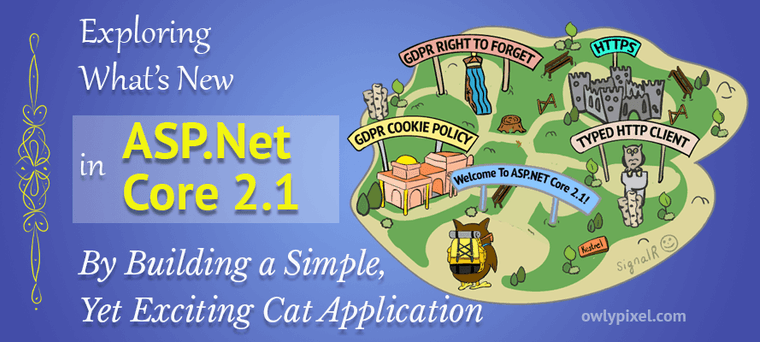
In this article, we're going to look at some of the new features of ASP.Net Core 2.1, such as HTTPS by default, GDPR support and Typed HTTP Client.
Oh hey there, owlytribe! Recently I wrote a post on Scaffolding an Application From Existing Database with EF Core on ASP.NET Core 2.0, and as it turns out, there’s a new version of ASP.NET Core on the block – ASP.NET CORE 2.1. Things sure move fast at Microsoft these days, right?
So, I decided to check out what’s new in town. If you’d like to join me, hop on the ride and enjoy this quick tour on latest features in ASP.NET Core 2.1.
What should I have installed in order to follow along?
- You should install the .NET SDK from their official website
- The latest version of Visual Studio 2017
ASP.NET Core has a number of different projects so you can get up and running quickly. Let’s go start a new project and create a new ASP.NET Core application.
Sometimes, when you’re on the system that doesn’t have a Visual Studio, knowing a couple of ASP.NET command line commands can come in handy.
Here is a short list of the most popular commands that you have to know.
- dotnet –info – This command gives you the list of all the things that are available for you to use when building an application.
- dotnet new – You start a new application by executing dotnet new command. This command will show you a list of different templates that are available in the system. In this list you’ll see things like simple console application, class library, unit test project and others.
- dotnet build – This command allows you to build your application from the command line.
Create a new project
We’ll kick things off by creating a new ASP.NET Core application.
- File –> New project –> ASP.NET Core Web Application
- Enter project name: CoreCats
Once you set up a project name it’ll start loading up all the templates available for our app.
When selecting project template, notice that now you can choose the ASP.NET Core version that you want to build with. Go ahead and select ASP.NET Core 2.1, that’ll make sure that our application is configured to use the latest version of the framework.
- Select Web Application project template
This template uses Razor pages. It’s a new feature that makes coding page-focused interfaces easier and faster.
Another thing that we can do here is to change the individual user accounts authentication. This will prepare for us a little SQL server database that we can interact with and save user information to.
- Change authentication to Individual user accounts
When it loads up, it has restored a bunch of NuGet packages for us.
NuGet packages are used to deliver platform-specific dlls, that work great on other operating systems or other versions of .NET Framework.
Program.cs file
In the solution explorer, you’ll see a Program.cs file that bootstraps and launches our application.
using System;using System.Collections.Generic;using System.IO;using System.Linq;using System.Threading.Tasks;using Microsoft.AspNetCore;using Microsoft.AspNetCore.Hosting;using Microsoft.Extensions.Configuration;using Microsoft.Extensions.Logging;
namespace CoreCats{    public class Program    {        public static void Main(string[] args)        {            CreateWebHostBuilder(args).Build().Run();        }
        public static IWebHostBuilder CreateWebHostBuilder(string[] args) =>            WebHost.CreateDefaultBuilder(args)                .UseStartup<Startup>();    }}
This file looks like a simple console application. We have our public static void Main(string[] args){...} method signature, which is the same as for the console app.
It’s going to create a default web host builder, which sets up a bunch of sensible standards around cookies and the way that it’s is going to build it and then run it on the Kestrel web server.
This is really cool because our application can run behind any other web server that we want to (reverse proxy mode).
Startup.cs file
Next, you’ll see a Startup.cs file. It’s the class that actually configures our server and sets up how our application is going to run inside that server.
using System;using System.Collections.Generic;using System.Linq;using System.Threading.Tasks;using Microsoft.AspNetCore.Builder;using Microsoft.AspNetCore.Identity;using Microsoft.AspNetCore.Hosting;using Microsoft.AspNetCore.Http;using Microsoft.AspNetCore.HttpsPolicy;using Microsoft.AspNetCore.Mvc;using Microsoft.EntityFrameworkCore;using CoreCats.Data;using Microsoft.Extensions.Configuration;using Microsoft.Extensions.DependencyInjection;
namespace CoreCats{    public class Startup    {        public Startup(IConfiguration configuration)        {            Configuration = configuration;        }
        public IConfiguration Configuration { get; }
        // This method gets called by the runtime. Use this method to add services to the container.        public void ConfigureServices(IServiceCollection services)        {            services.Configure<CookiePolicyOptions>(options =>            {                // This lambda determines whether user consent for non-essential cookies is needed for a given request.                options.CheckConsentNeeded = context => true;                options.MinimumSameSitePolicy = SameSiteMode.None;            });
            services.AddDbContext<ApplicationDbContext>(options =>                options.UseSqlServer(                    Configuration.GetConnectionString("DefaultConnection")));            services.AddDefaultIdentity<IdentityUser>()                .AddEntityFrameworkStores<ApplicationDbContext>();

            services.AddMvc().SetCompatibilityVersion(CompatibilityVersion.Version_2_1);        }
        // This method gets called by the runtime. Use this method to configure the HTTP request pipeline.        public void Configure(IApplicationBuilder app, IHostingEnvironment env)        {            if (env.IsDevelopment())            {                app.UseDeveloperExceptionPage();                app.UseDatabaseErrorPage();            }            else            {                app.UseExceptionHandler("/Error");                app.UseHsts();            }
            app.UseHttpsRedirection();            app.UseStaticFiles();            app.UseCookiePolicy();
            app.UseAuthentication();
            app.UseMvc();        }    }}
The startup class has a constructor that takes an IConfiguration. This is a new configuration object in .NET Core that is more key:value based than the old configuration manager that was available in the .NET Framework. We stash a copy of that for future use.
Also here we have two methods: ConfigureServices(), and Configure().
ConfigureServices() is used to configure different dependency injections that we might need in our application, things like cookie policies, entity framework and identity, which is used to authenticate and authorize users.
The Configure() method is what configures the request pipeline. It sets up how things will be processed in our application. Every request goes through this pipeline.
Inside this method, all the app.Use statements are executed once, but the behaviors that they’re assigning will be executed on every request through the pipeline.
Razor pages
Next, let’s look at our Pages folder. It contains a bunch of Razor pages that look just like the Razor templates that might be familiar to you from the ASP.NET MVC.
If you open up an Index.cshtml page, you’ll see that it has a @page directive at the top. This directive declares a standalone page, which means that it handles requests directly, without going through a controller.
@page@model IndexModel@{    ViewData["Title"] = "Home page";}
<div id="myCarousel" class="carousel slide" data-ride="carousel" data-interval="6000">    <ol class="carousel-indicators">    ...
@model defines the model that this page uses, and the rest of the page is pretty much a simple HTML.
We also have a _Layout.cshtml page inside of the Shared folder. This is where we’re configuring all HTML that surrounds our page like header and footer.
If you scroll down a bit, you’ll see @RenderBody() directive, where the contents of the page is going to be injected.
<div class="container body-content"> @RenderBody() <hr /> <footer> <p>© 2018 - CoreCats</p> </footer></div>...Another interesting elements that you might notice on the page are called Tag helpers. Those things will run server side and then the result will be injected right into your page.
These are the main building blocks that you can encounter in a typical ASP.NET Core web application. Now, let’s try to run our app and see what we’ve got here.
Trying out the new HTTPS feature
By default, Visual Studio 2017 use IIS Express as a web server for the project. We need to change that to our local server by selecting CoreCats from the drop-down menu.

Alright, now we can start our app by pressing Ctrl+F5. You’ll see the dialog asking you to trust the development SSL certificate issued by IIS Express.
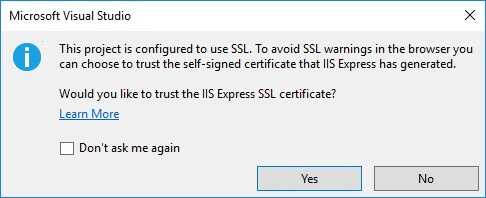
Once you accept that, another window will pop up with the warning to install the certificate for HTTPS development. We’ll agree with that too.

What that will do on Windows, is it will copy the certificate into the trusted store, so the browsers won’t complain about you using an untrusted certificate.
On MacOS it will actually deal with the keychain, on Linux you’d have to set that up in a distro-specific way.
All these questions appear because you’re working with SSL protocol right from the start and the system just makes sure that you know that it’s enabled and works.
When the page loads, you’ll see the index template that is the same as it was for all previous ASP.NET Core versions.
Now, if you navigate to the localhost:5000 in your browser, it automatically redirects you to the https://localhost:5001.
That’s because of this line in our startup class:
app.UseHttpsRedirection();This basically means, that if anybody requests a non-encrypted HTTP connection, they’re going to be redirected to a secure connection.
You can see exactly what URLs it’s using in the launchSettings.json file:
{ "iisSettings": { "windowsAuthentication": false, "anonymousAuthentication": true, "iisExpress": { "applicationUrl": "http://localhost:25022", "sslPort": 44368 } }, "profiles": { "IIS Express": { "commandName": "IISExpress", "launchBrowser": true, "environmentVariables": { "ASPNETCORE_ENVIRONMENT": "Development" } }, "CoreCats": { "commandName": "Project", "launchBrowser": true, "applicationUrl": "https://localhost:5001;http://localhost:5000", "environmentVariables": { "ASPNETCORE_ENVIRONMENT": "Development" } } }}So, now you can develop with HTTPS right from the beginning, so you can flush out all those issues that are specific to an HTTPS environment.
GDPR cookie policy
When we first start our application, if you look at the top of the page you’ll see there a privacy and cookies policy. According to GDPR, you need to notify people about the cookies and ask them whether or not they allow to install cookies on their machines.
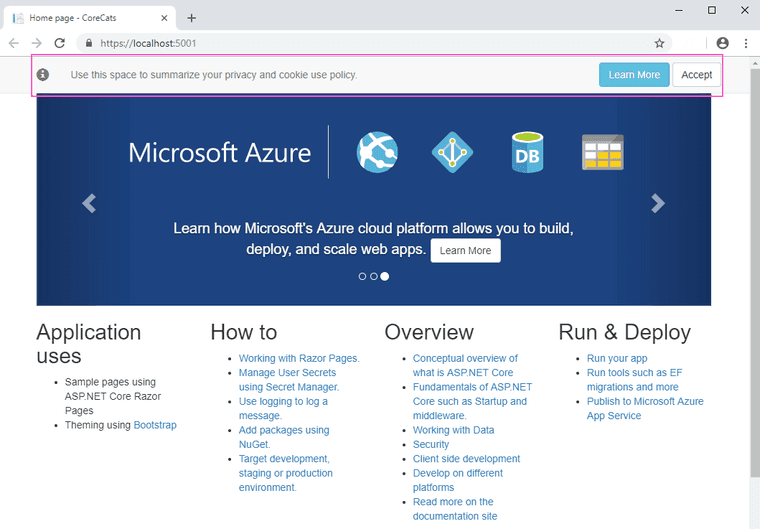
If you click “Learn more”, you’ll be redirected to a Privacy policy page, where you can put your privacy policy so that everybody knows that you’re not using your machine to mine bitcoins.
That cookie consent policy line actually lives inside of CoreCats\Pages\Shared\_CookieConsentPartial.cshtml file, so you can easily go and change it according to your preferences.
We’ll go ahead and click “Accept” here.
Now, if you go into your dev tools you’ll see that there’s the consent cookie that’s been established. You can delete this cookie to see the UI notification again.

There’s another interesting thing with cookies. You now can flag all of your cookies as essential or non-essential.
Ok, clear all cookies that we have so far and let’s add another non-essential cookie to our privacy policy page.
- Clear all ASP.NET Core cookies in your browser.
- Open the
\CoreCats\Pages\Privacy.cshtmlpage. - Add a new cookie right under the ViewData property like so:
@page@model PrivacyModel@{ ViewData["Title"] = "Privacy Policy"; Model.Response.Cookies.Append("owl", "value", new Microsoft.AspNetCore.Http.CookieOptions { IsEssential = false });}- Relaunch our app and navigate to the
https://localhost:5001/PrivacyURL.
You should see the cookie policy bar again. Notice, that no cookies have been added to the page until we accepted the cookie policy.
Now, click “Accept” and refresh the page again. You’ll see that we have two cookies now. One is the general consent cookie and the second one – our non-essential owl cookie.

So, if the user doesn’t accept the policy, none of the non-essintial cookies will fly.
Non-essential cookies can be used if you want to keep some preferences that you want to store in your application, things like colors or font sizes.
What might be an essential cookie is something like a session state or that user Id that you’re using to find out who is currently logged in. That’s an example of an essential cookie that’s absolutely necessary to run your application.
GDPR right to forget
The next new thing that we have now is the ability to completely remove all user data from the website. Every user should be able to see what information is being tracked and logged about them on the website.
- Register and login to the website.
If you’ll see the migrations page, click Apply Migrations.
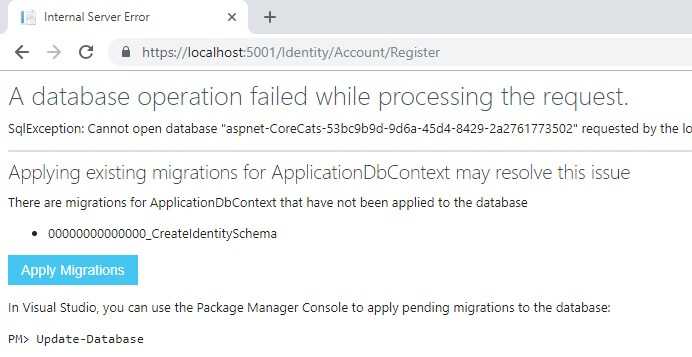
- Navigate to you user profile page.
If you open your user profile page https://localhost:5001/Identity/Account/Manage, you’ll see a new entry down there that is called Personal data with two buttons.
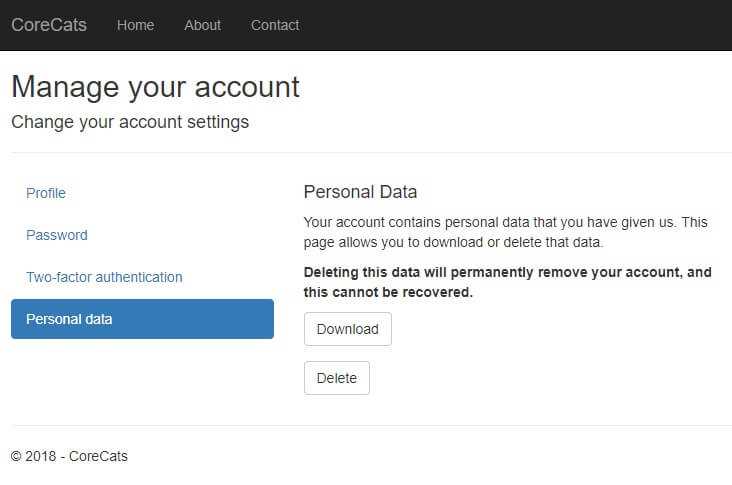
If you click Download and open that JSON file, you’ll see a bunch of data that is being stored about the current user.
{ "Id": "ee965d92-12c5-4c70-97e9-479eac1c4d08", "UserName": "masterowl@owlypixel.com", "Email": "masterowl@owlypixel.com", "EmailConfirmed": "False", "PhoneNumber": "null", "PhoneNumberConfirmed": "False", "TwoFactorEnabled": "False", "Authenticator Key": null}If you click the Delete button, it’ll wipe out that information and you’re no longer the member of this application.
If you decide to extend your user profile object and add new features to it, there are actual headers that you can put on your profile properties to mark them as personal data.
Typed HTTP client
Another cool thing that we can use now is a typed client. We can actually define a class that will hold the strongly typed client, which we can use to interact with the API.
In our application we’re going to reach out to The Cat API, pull a random cat gif and display it on the page.
- Add a new class named CatsService.cs to the project with the following code:
using System;using System.Collections.Generic;using System.Linq;using System.Threading.Tasks;using System.Net.Http;
namespace CoreCats{    public class CatsService    {        public HttpClient Client { get; set; }
        public CatsService (HttpClient client)        {            client.BaseAddress = new System.Uri("https://thecatapi.com/");                        client.DefaultRequestHeaders.Add("User-Agent", "HttpClient-Sample");
            this.Client = client;        }    }}
Here we have a constructor that receives an HTTP client that we’ll be using later.
We also set up a client base address, headers and store this in the Client property.
Next, we need to configure this inside of our Startup.cs class, so that it can be requested inside of the application. Add this in the ConfigureServices method:
services.AddHttpClient<CatsService>();Now let’s add a page that actually use this typed client.
- Pages –> Add –> Razor page
- Enter the page name: TypedCats
- Paste the following code into the
TypedCats.cshtml.csfile:
using System;using System.Collections.Generic;using System.Linq;using System.Threading.Tasks;using Microsoft.AspNetCore.Mvc;using Microsoft.AspNetCore.Mvc.RazorPages;using Newtonsoft.Json;
namespace CoreCats.Pages{ public class TypedCatsModel : PageModel { private CatsService _cService;
public string CatImageURL { get; set; }
public TypedCatsModel(CatsService service) { _cService = service; } public async Task OnGetAsync() { String TimeStamp = DateTime.Now.ToString(); var query = "/api/images/get?format=json&type=gif×tamp=" + TimeStamp; var APIResult = await _cService.Client.GetStringAsync(query); List<CatApiResponse> DeserializedResult = JsonConvert.DeserializeObject<List<CatApiResponse>>(APIResult); CatImageURL = DeserializedResult[0].Url; } public class CatApiResponse { public string id { get; set; } public string Url { get; set; } public string SourceURL { get; set; } } }}Here we’re setting up a private field to receive CatsService. Then we’re creating a property for the image URL that we’ll receive from the API.
Next, we have a constructor that will receive CatsService that’s already populated with our HTTP client.
Following that, in the OnGet() method we’re basically forming a request, sending it, getting a response and getting our CatImageUrl from there.
We also have a CatApiResponse class that represents the response from the API for deserialization purposes.
Finally, we need to add some code to actually output our image on the page.
- Paste the following code into the
TypedCats.cshtmlfile:
@page@model CoreCats.Pages.TypedCatsModel@{    ViewData["Title"] = "TypedCats";}
<h2>TypedCats</h2>
<img src="@Model.CatImageURL" alt="Alternating Cats" />
Great! Now we can start our app and see the result.
- Launch our app by pressing
Ctrl+F5 - Navigate to the
https://localhost:5001/TypedCats
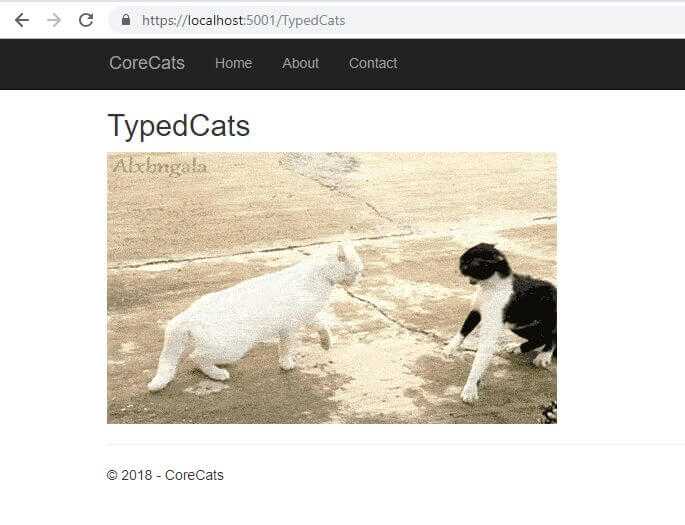
That’s it! We now have our typed client fetching cute images of cats on the page.
Of course, you should keep in mind that this is in no way a production-ready code, it’s far from the ideal. But it gives you the basic idea of how to use these new features.
There are other new features of ASP.Net Core 2.1 such as:
- MVC functional test infrastructure – Write functional tests for your app in-memory.
- Kestrel on Sockets – Managed sockets replace libuv as Kestrel’s default transport.
- Generic host builder – Generic host infrastructure decoupled from HTTP with support for DI, configuration, and logging.
- Updated SPA templates – Angular, React, and React + Redux templates have been updated to use the standard project structures and build systems for each framework (Angular CLI and create-react-app).
But since this post is already pretty long we’ll leave that for another time.
So, stay tuned and subscribe to my newsletter below for more information on that topic.
I’ll go drink some homemade apple juice.


