Build a Store With Shopify and Gatsby From Scratch
In this simple step-by-step tutorial you'll learn how to build your own online store from scratch using Gatsby and Shopify.
TLDR: In this article, we’re going to build a Gatsby store with Shopify from scratch. Our Gatsby site is going to pull the product information from Shopify and display it on the page. We’re also going to use a shopify-buy plugin for the checkout process.
Introduction
Have you ever thought about building an e-commerce store with Gatsby as a static site?
You probably thought that It’s impossible due to the fact that for sure it requires some dynamic functionality.
Turns out you can do that!
In fact, the result is a pretty slick combination of lightning-fast Gatsby pages and painless Shopify checkout.
If you’re interested and have 30 minutes of free time, join me as we’ll go through each step together and build a demo-store from the ground up.
Creating a Shopify account
With Shopify, you have two kinds of accounts that you can create: Store trial, or Shopify Partner. Both of these types of accounts are free and don’t require a credit card to start with, but Shopify Partner is more suitable for our learning purposes since it doesn’t require us to choose a plan after 14 days.
Let’s go ahead and create a Shopify account.
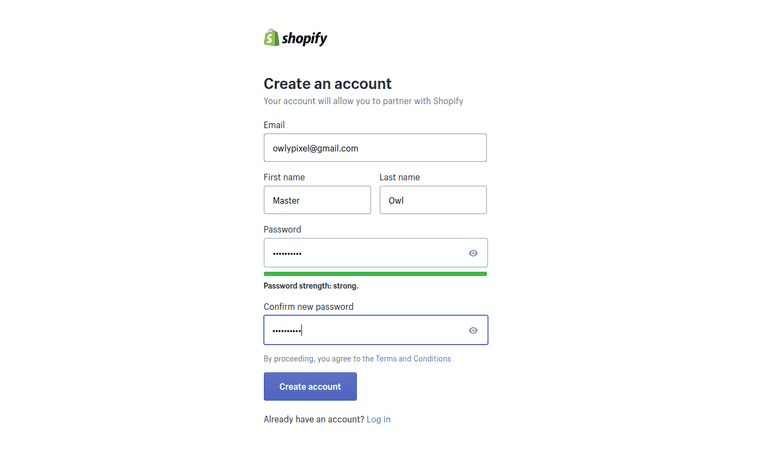
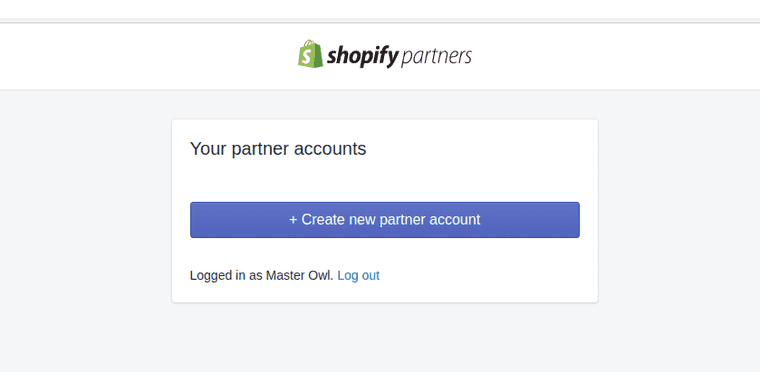
After creating a Shopify account, click Create new partner account, fill in some basic questions and we’re ready to visit our dashboard.
Once we’ve signed in to our dashboard, we’ll click on Stores in the sidebar and create a new development store. It’s password-protected by default and we don’t have to pick a plan until it goes ‘live’.
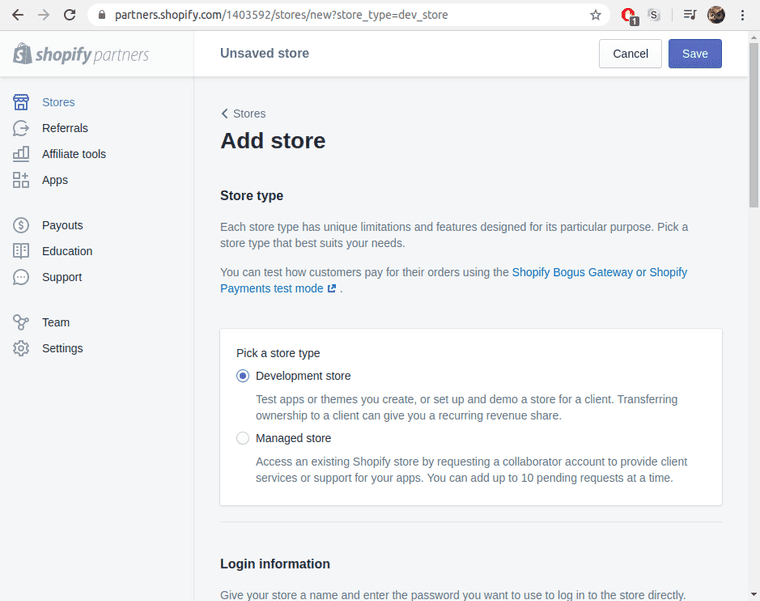
Next, we’ll need to fill in the name of the store and the rest of the fields with some test data.
If everything goes smoothly, we’ll see a success message and the main page of our store.
Configuring a test payment provider
Now, navigate to our store’s “Settings” / “Payment providers”, choose “third-party provider”, and activate the “Bogus Gateway”.
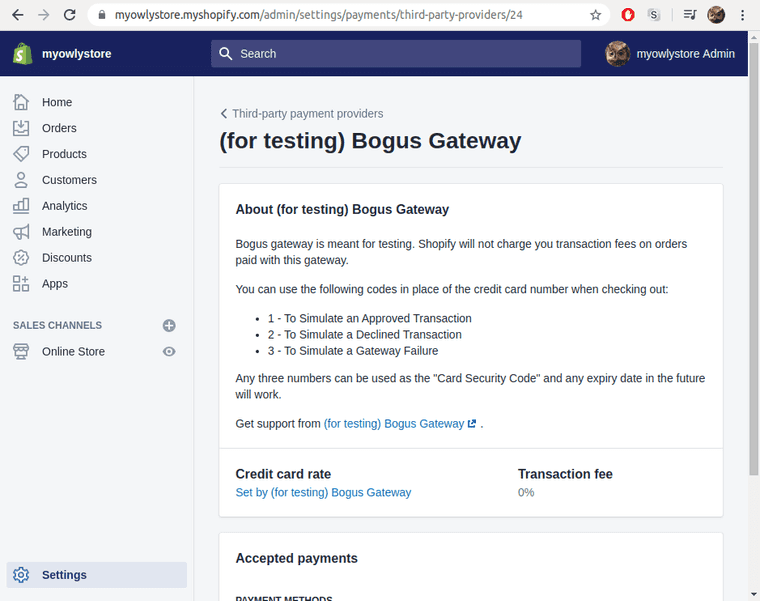
This will allow us to make test payments and go through the entire process from end to end without spending real money.
Creating a private app
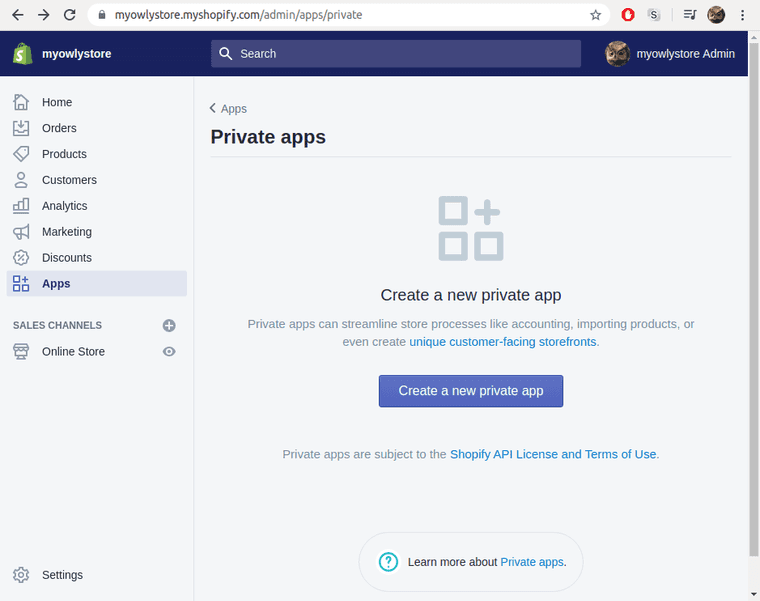
Alright, the next thing that we need to do is to create a connection between the Shopify store and our future Gatsby front-end. For this, we’ll need to create a new Private app that lets us use all necessary APIs.
It’ll give us some keys and allow us to select which privileges the app will have in terms of reading and writing product data.
In the sidebar select “Apps”, then click on the link “Manage private apps”.
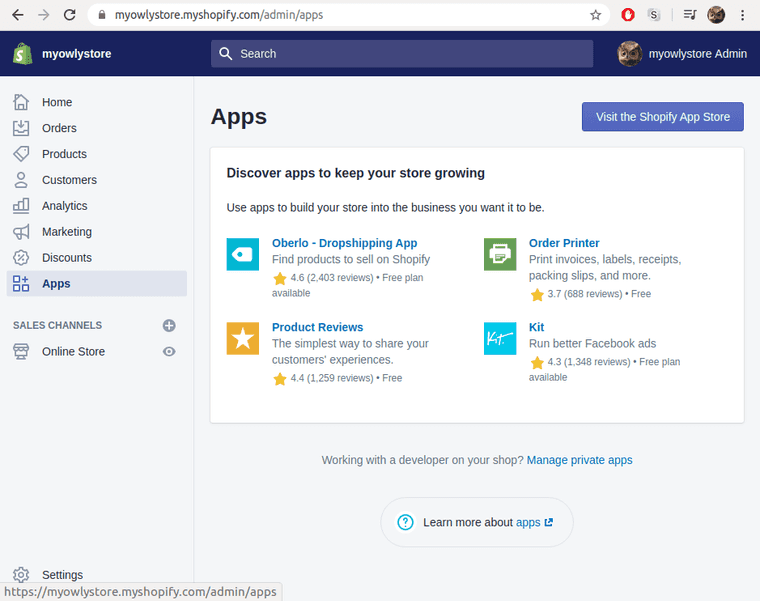
Then, go ahead and create a new Private app.
Setting up Storefront permissions
Give our app a name, then scroll all the way down and check “Allow this app to access your storefront data using the Storefront API” checkbox. This will reveal more options below.
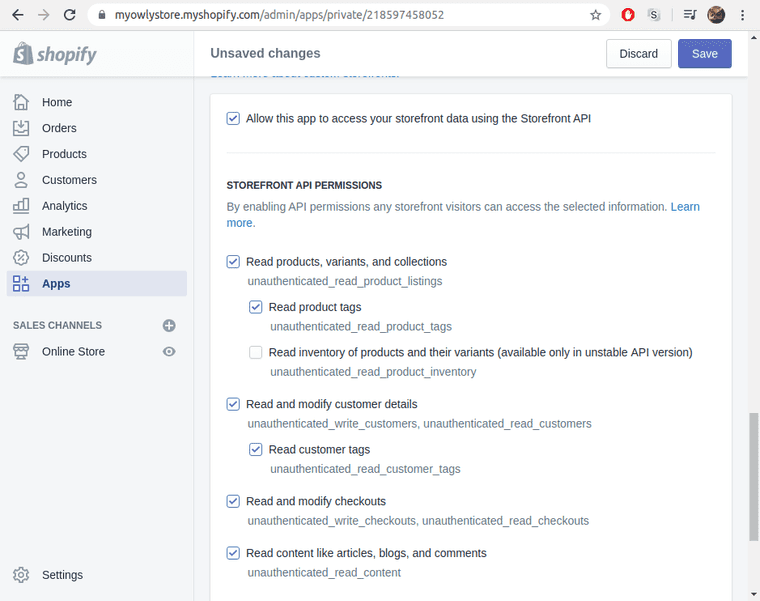
Additionally, we’ll need to check “Read product tags” and “Read customer tags”, because without these options we might get an error during Gatsby’s build.
Creating products
Once we’ve done that, we can go ahead and create actual products for our store. Being a guitar nerd, for this demo store, I decided to sell guitar pedals. You can choose any product that you wish to sell.
In the sidebar select “Products” and create at least 3 products with the name, description, and an image.

That was pretty much all the basic setup we need at the Shopify side of things. Now we can move on to the Gatsby part and see how we can pull Shopify data into Gatsby’s GraphQL layer.
Creating a Gatsby site
Since we’re going to be hosting our store on Netlify, we’re going to save ourselves a lot of time by using Netlify CLI. It makes all basic website operations so much easier and faster.
npm install netlify-cli -gAlright, now let’s create a project folder somewhere on your computer with the name of owlystore, then in this folder run these commands:
npm init -ynpm install gatsby react react-dom gatsby-source-shopify gatsby-transformer-sharp gatsby-plugin-sharp gatsby-image gatsby-source-filesystem dotenv Woow, that looks like a lot of stuff, you might say. Don’t worry. We’ll discuss each package and why do we actually need it below.
gatsby react react-dom- these siamese triplets always go together. It’s a core of any respectable Gatsby website out there on the internets. So, it’s a *“Must have”*😊.gatsby-source-shopify- the hero of today’s story. Pulls the data out of our Shopify store into Gatsby’s GraphQL layer at build time.gatsby-image- gives us a ton of image optimization options. The blur-up effect, traced SVG, you name it… These are all the things for which we really love this plugin.gatsby-transformer-sharp- all these great gatsby-image enhancements are auto-generated at build time by this fantastic transformer plugin.gatsby-plugin-sharp- low-level engineering worker that talks directly to a huge pain in the neck called Sharp. If I’m not mistaken, this is a C library that was ported to Node and now it’s grumpy as hell and complains at any possible opportunity. But it’s an actual superstar when it comes to image processing.dotenv- we need this to work with our environment variables like storefront API token.
Here’s a short visual on how gatsby-source-shopify pulls the data from Shopify store:
Ok, at least it’s how I think it does that, but I can be wrong here 😊.
Next, to let Netlify Dev know that this is a Gatsby site, we’ll create a script named gatsby in your package.json like so:
... "scripts": { "test": "echo \"Error: no test specified\" && exit 1", "gatsby": "gatsby" },...We’ll also need to create a gatsby-config.js file at the root of our project, where we list some of our previously installed packages with their settings.
require("dotenv").config({  path: `.env.${process.env.NODE_ENV}`,})
module.exports = {  plugins: [    'gatsby-plugin-sharp',    'gatsby-transformer-sharp',    {      resolve: 'gatsby-source-filesystem',      options: {        name: 'pages',        path: 'src/pages'      }    },    {      resolve: 'gatsby-source-shopify',      options: {        shopName: 'myowlystore',        accessToken: process.env.GATSBY_SHOPIFY_STOREFRONT_TOKEN,        includeCollections: ["shop"],      }    }  ]}
In order for our Shopify plugin to be able to get data from our store, we’ll need to use a “Storefront access token”. We can get it in our private app settings, in the “Storefront API” section.
Also, we’re only including a “shop” collection here in order not to complicate things.
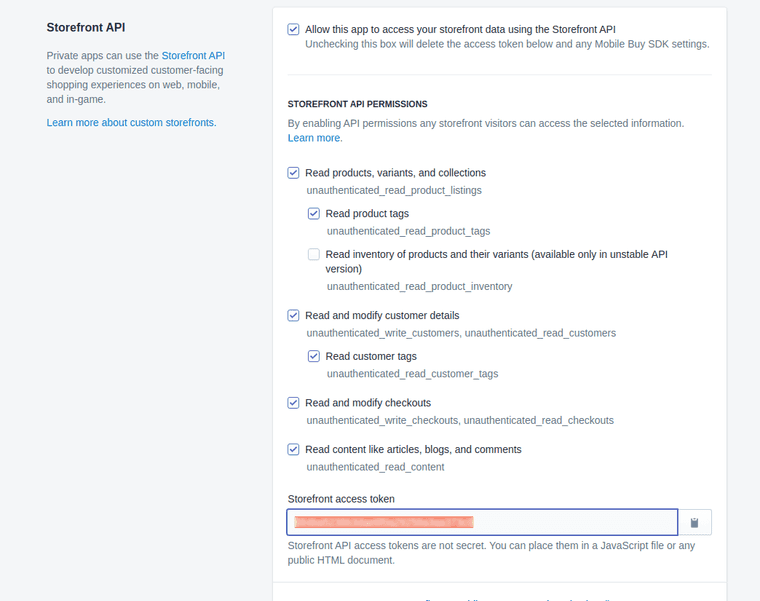
Create a .env.development file at the root of our project, copy and paste the key there.
GATSBY_SHOPIFY_STOREFRONT_TOKEN=<your Shopify storefront access token>
Note, that we’ll be using a GATSBY_ prefix for our variable names, otherwise, Netlify won’t recognize them even if we add them in their app UI.
Next, we’re following a standard Gatsby path and creating the main page of our app. Create an src folder, and in it create a pages sub-folder with the index.js file where we export a simplest possible component:
import React from 'react'
export default () => (    <h1>Hello</h1>)
It’s time to check how it works. Start Netlify Dev with this command:
netlify dev
Now if we visit http://localhost:8000/___graphql in the browser, we can explore all available for us data.
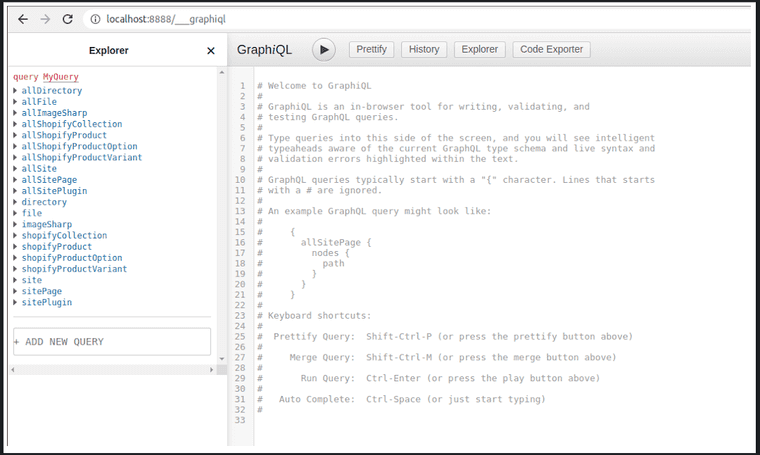
What’s cool about this is that as developers we don’t have to write any code that directly manipulates this data. Several lines of config are all it takes to get access to the whole thing.
Let’s look at the data that we have. As you can see, we have several Shopify related nodes:
allShopifyCollection- these are just big buckets of stuff. We can group products in collections to make the shopping experience better for our visitorsallShopifyProduct- this represents an individual product for sale in our shopallShopifyProductOption- custom product property namesallShopifyProductVariant- different variants of the product like color, size, etc.
Displaying our products on the page
Alright, it’s time to use this data and show our products on the page. Update our index.js file to the following state:
import React from 'react'import { graphql } from 'gatsby'
export const query = graphql`  {    allShopifyProduct {      nodes {        title        description        id        variants {          shopifyId          priceV2 {            amount            currencyCode          }        }        images {          localFile {            childImageSharp {              fixed(width: 300) {                ...GatsbyImageSharpFixed_withWebp_tracedSVG              }            }          }        }      }    }  }`export default ({data}) => (  <>    <h1>The RAW page data</h1>    <pre>{JSON.stringify(data, null, 2)}</pre>  </>)
Here we’re importing graphql at the top to be able to perform queries. Following that we’re exporting a page query, which will be executed and injected as data prop in our component. Finally, we’re dumping all the data on the page in a pre tag.
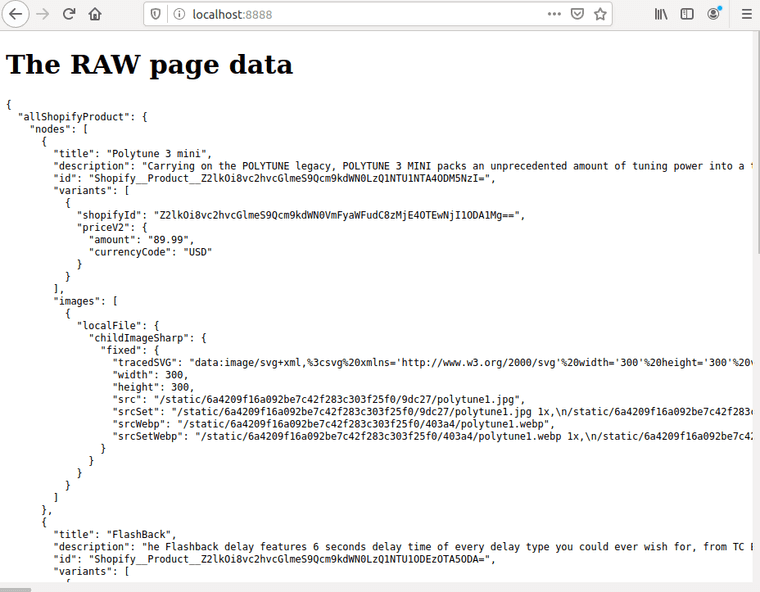
This looks quite terrible, but it works! We’re now getting the data from Gatsby’s GraphQL layer. Let’s turn this into an actual product list.
In our root folder create a src/components folder and Product.js file in it.
import React from 'react'import Image from 'gatsby-image'
const Product = ({product}) => {  return (    <div className="product-wrap">      <Image fixed={product.images[0].localFile.childImageSharp.fixed}/>      <h2>{product.title}</h2>      <p>{product.description}</p>      <button>Buy for {product.variants[0].priceV2.amount}</button>    </div>  )}
export default Product
Now let’s use that product component in our index.js page (don’t forget to import in at the top):
...export default ({data}) => ( <> <h1>Guitar pedals for sale!</h1> <div className="products-grid"> {data.allShopifyProduct.nodes.map(product => ( <Product key={product.id} product={product}/> ))} </div> </>)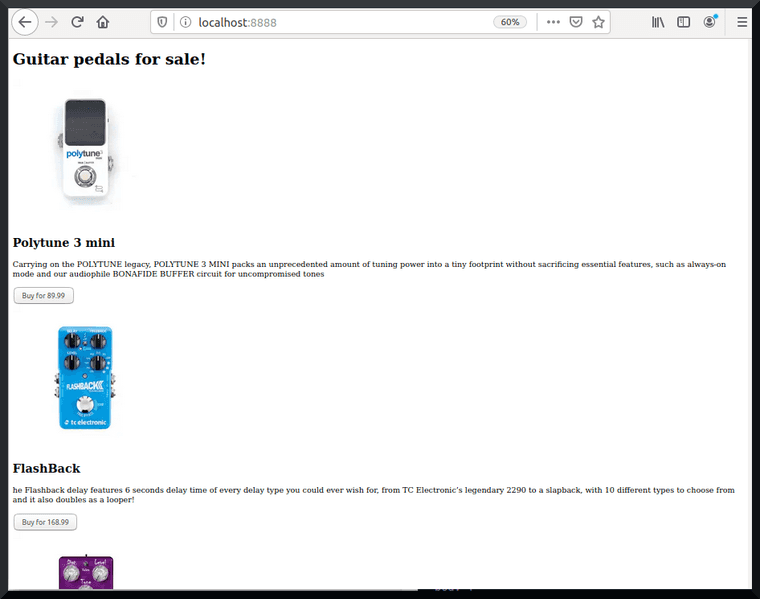
Making it look less terrible
We probably should add a bit of styles in order for this thing not to look so terrible.
In our pages folder create an index.css file and import it in the index.js file like so: import "./index.css".
* { box-sizing: border-box;}body { padding: 6rem; display: flex; justify-content: center; align-items: center; padding: 6rem; background-color:#f5f5f5;}.products-grid { display: grid; grid-template-columns: repeat(auto-fit, minmax(320px, 1fr)); grid-gap: 6rem; grid-auto-rows: auto; align-items: start;}.product-wrap { padding: 1.5rem; background-color: #fff; box-shadow: 0 3rem 6rem rgba(0, 0, 0, 0.1); overflow: hidden; height: 100%;}.product-wrap h2 { font-size: 2rem; font-weight: 500; color:#0d0d0d; margin-bottom: 1.5rem;}.product-wrap p { font-size: 1.2rem; line-height: 1.2; color:#3d3d3d;}.product-wrap button { background: none; background:#00ad9f; border: 0; border-radius: 4px; box-shadow: 0 0 0 1px rgba(255,255,255,.1),0 2px 4px 0 rgba(14,30,37,.12); color: #fff; cursor: pointer; display: inline-block; font-family: inherit; font-size: .9rem; font-weight: 500; line-height: 1.618em; outline: 0; padding: .382em 1em; position: relative; text-align: center; text-decoration: none; text-shadow: none; transition: all .15s ease; vertical-align: middle; z-index: 1;}.product-wrap button:hover { background-color:#00c2b2; color:#fff; text-decoration: none;}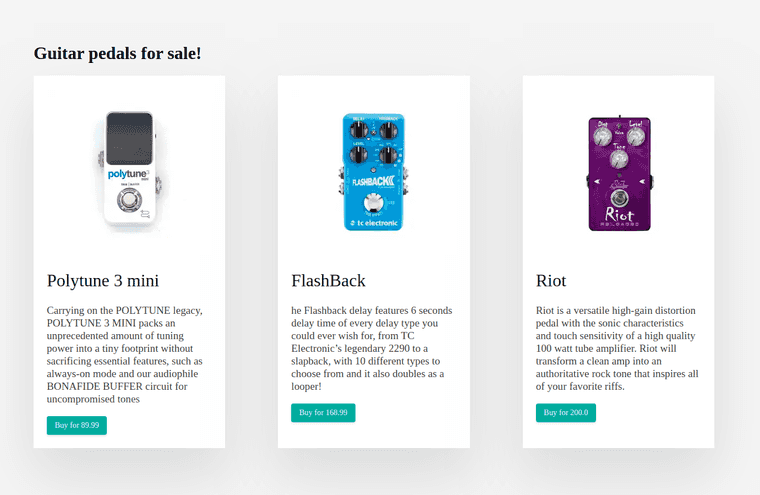
Now it looks more presentable.
Using Shopify-buy plugin
The next step for us here is to use the checkout plugin from Shopify that’s called shopify-buy, so when someone buys an item we’re going to send them through Shopify’s checkout workflow.
Shopify’s checkout workflow is a rad thing. It allows us to use Google pay or Apple pay, has tracking and all sorts of extra nice things that we don’t have to build ourselves.
npm install shopify-buyThis plugin basically does all the heavy lifting for us. All we have to do is to install it, use appropriate functions that it provides for us and we’ll have a fully functional checkout flow.
When we’re ready for checkout and have all the necessary information, Shopify will present us with a standard checkout page for all Shopify sites.
What’s really great about this is that we don’t have to worry about handling credit cards, security, or anything of that manner. Shopify will deal with this for us.
To clearly illustrate the steps that you need to take for successful checkout, we’ll forget all the “clean code” practices and dump everything in a huge function called checkout. We’ll call this function whenever someone clicks the Buy button.
Let’s update our Product.js file to the following state:
import React from 'react'import Image from 'gatsby-image'import Client from 'shopify-buy'

const Product = ({product}) => {    async function checkout () {    // build a client    const client = Client.buildClient({      storefrontAccessToken: process.env.GATSBY_SHOPIFY_STOREFRONT_TOKEN,      domain: `${process.env.GATSBY_SHOP_NAME}.myshopify.com`,    })
    // create a checkout    const checkout = await client.checkout.create()        // create an array of line items    const variantId = product.variants[0].shopifyId    const lineItemsToAdd = [{ variantId, quantity: 1 }]
    // add line items to the checkout    const checkoutId = checkout.id    const newCheckout = await client.checkout.addLineItems(      checkoutId,      lineItemsToAdd    )        // finish the checkout by visiting webUrl    window.open(checkout.webUrl)  }  return (    <div className="product-wrap">      <Image fixed={product.images[0].localFile.childImageSharp.fixed}/>      <h2>{product.title}</h2>      <p>{product.description}</p>      <button onClick={checkout}>Buy for {product.variants[0].priceV2.amount}</button>    </div>  )}
export default Product
So, let’s look at what’s happening here:
- Build the client - First, we need to initialize the client, which will help us to interact with the API and do all the things. When we’re creating a client, aside from the
storefrontAccessToken, we’ll also need to specify the shop name, which we’ll also need to add to the.env.developmentfile.
GATSBY_SHOPIFY_STOREFRONT_TOKEN=<your Shopify storefront access token>
GATSBY_SHOP_NAME=<your shop name>
- Create a checkout - Next, we’re creating a new checkout. It’s like an object where we collect all necessary information before presenting it to Shopify.
- Prepare a list of line items and add them to the checkout - After that, we’re creating an array of items, which in our case contains only one item, and adding it to the checkout.
- Visit checkout URL - Finally, we’re finishing our checkout by visiting the URL where we can complete the purchase using test credentials.
Great, now that we know what we’re doing, let’s start netlify dev again and try to buy something in our store.
Now, after clicking the Buy button on the product, we’re redirected to a Shopify checkout page. All we need to do here is to fill out some contact information, select the shipping method, enter test credit card data, and click Buy Now.
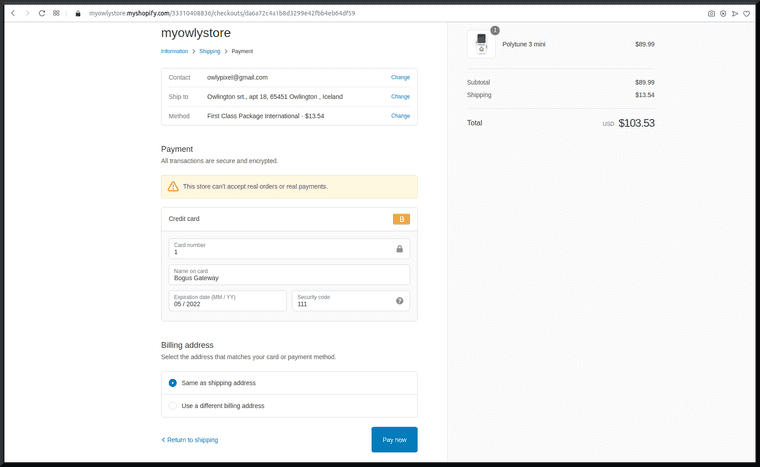
To simulate a transaction in your development store, you can use Shopify’s Bogus Gateway test info:
- Name on card - Bogus Gateway
- Credit card number - 1 for a successful transaction
- CVV - any 3-digit number (for example, 111.)
- Expiry Date - any random date in the future
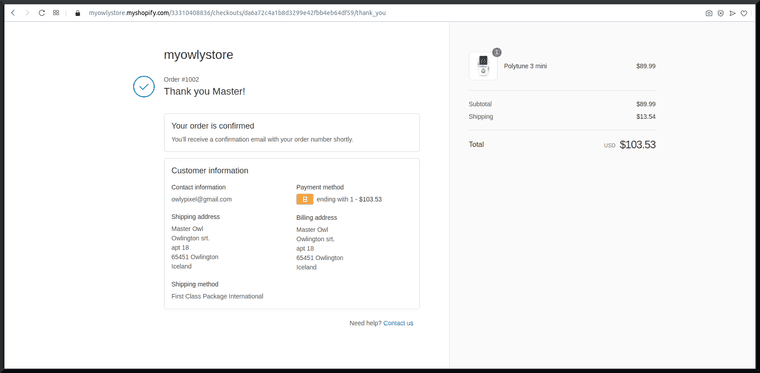
If you fill out all the parameters correctly, you’ll be presented with a success page. Congrats on your first purchase!
Deploying to Netlify
Before deploying our store to Netlify, we need to create a GitHub repo. To make sure that we don’t accidentally commit our secret keys, create a .gitignore file in the root folder of our repo.
public.cachenode_modules*DS_Store*.env*.idea/Now we can create a new repo on GitHub, then add and push our code to it:
git init# !! Use your repo name belowgit remote add origin git@github.com:yourusername/yourreponame.gitgit add -Agit commit -m 'initial commit'git push -u origin masterNext, Netlify CLI will help us to create a site right from the command line. Stop the development server if it was running and run the following command from the root of your project:
ntl initIf you’re not logged in, it’ll open a login page for you, and after successful authorization, it’ll walk you through a set of questions:
- What would you like to do? — choose “Create & configure a new site”
- Team — choose which Netlify team you want to add this site to
- Site name (optional) — owlystore
- Your build command — gatsby build
- Directory to deploy — public/

It’ll create some hooks so whenever we push to this repo it’ll automatically deploy to Netlify.
Configuring site’s environment variables
Alright, now that we have our site created, we need to add our Storefront token and shop name env vars on Netlify. Run the following command:
netlify openThis will open a browser with our site. Navigate to the Settings tab and there, in the section Build & Deploy -> Environment add our variables.
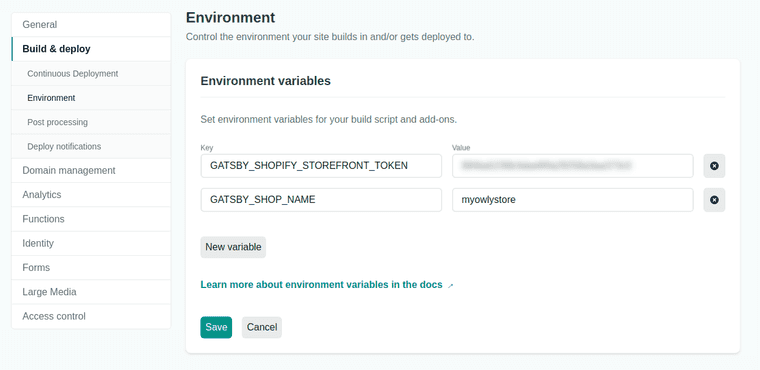
Copy-paste the env vars that you have in .env.development file, save these settings, then visit the store by following the link from the Overview tab.

And that’s it! We now have a live working demo-store built with Gatsby and Shopify.🎉
Next steps
While technically this code works, there are still a lot of things that can be improved. For example, you could use React Context to make our store globally available, introduce a shopping cart to have the ability to buy more than one item, add custom attributes to the checkout, create a Netlify build hook to trigger rebuild on product changes, etc.
Alternatively, if you’re not feeling like coding, you can check out this awesome Gatsby Shopify Starter, which provides you everything you need right out of the box.
Hope this article was useful for you, and I’ll go gather some strawberries in my garden, they’ve just ripened!
Stay awesome!


